Skip to content

Sourdough Adventures Posts

Sourdough rehydrating

From dehydrated sourdough to active starter.

Come along with me on my journey to rehydrate my starter. I will be documenting my process, complete with photos.

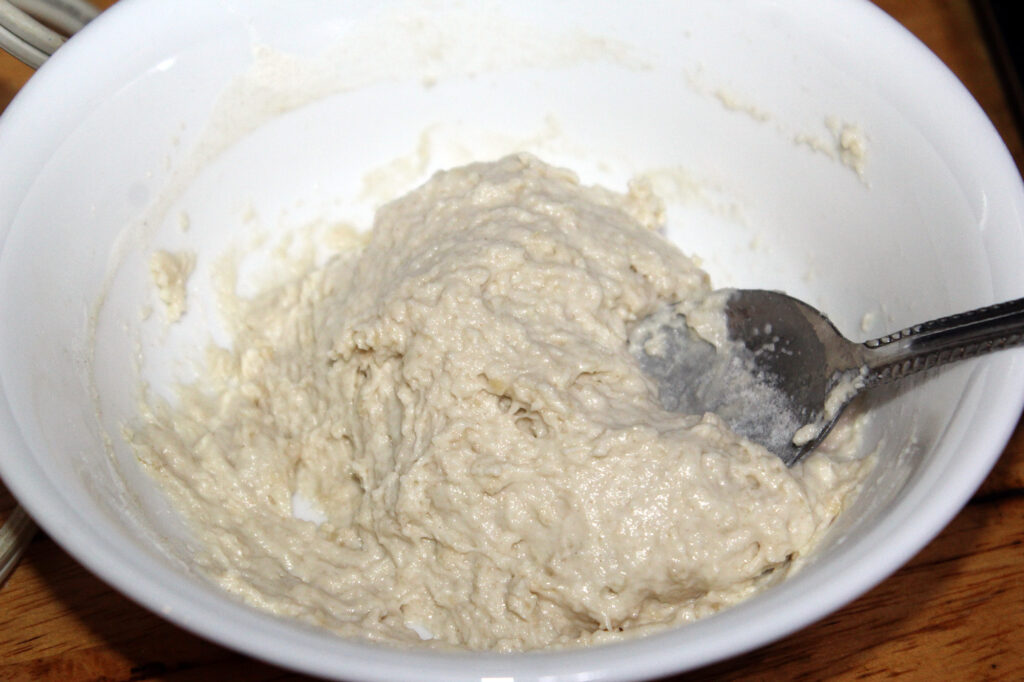
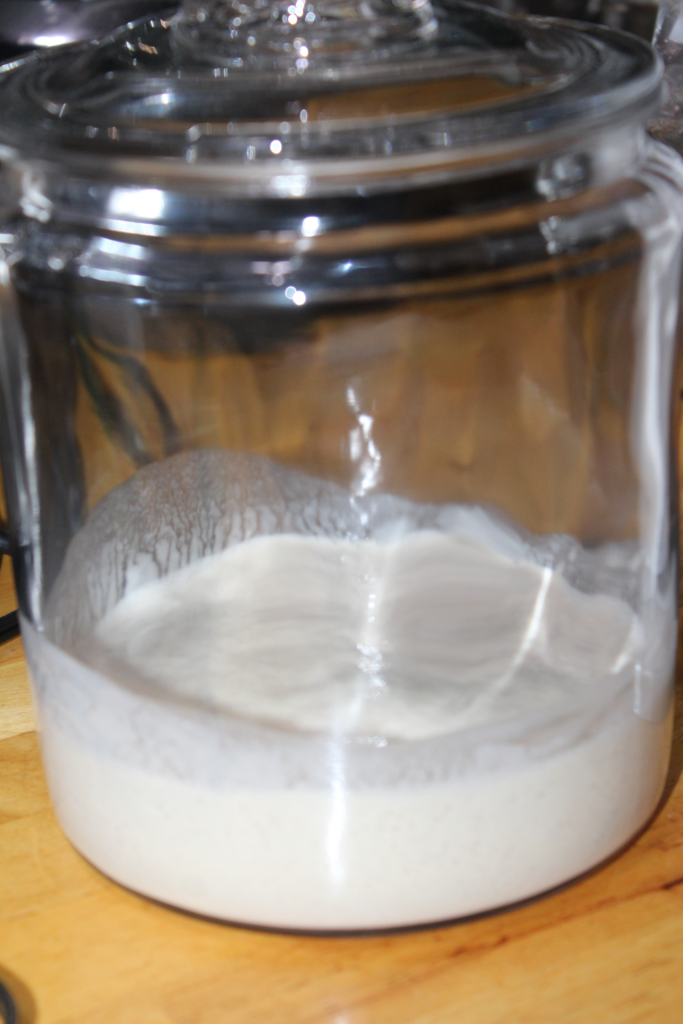
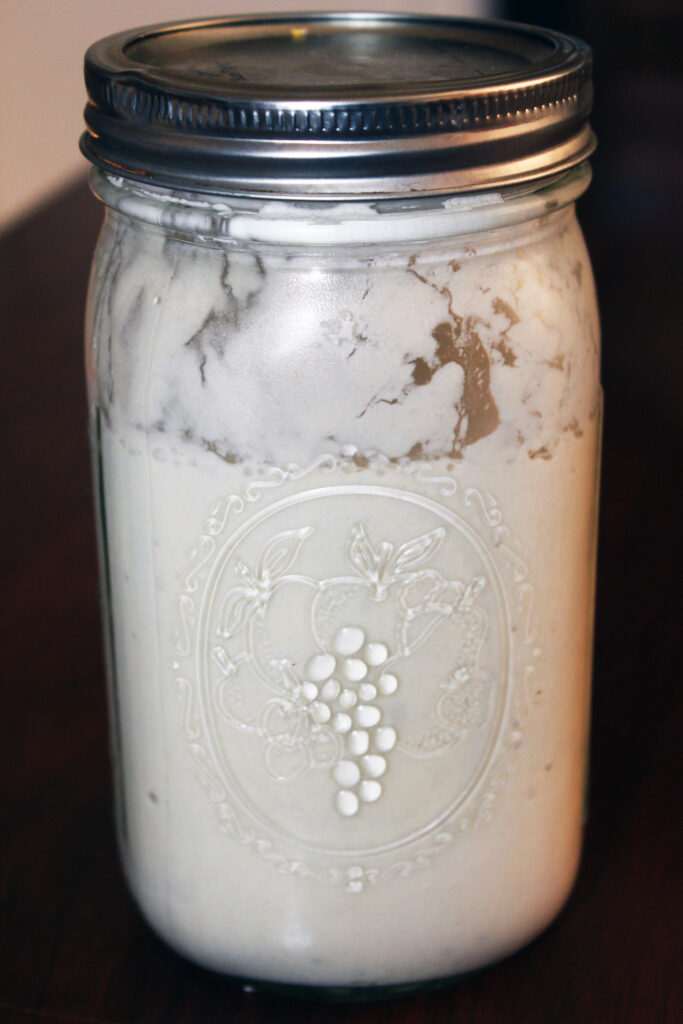
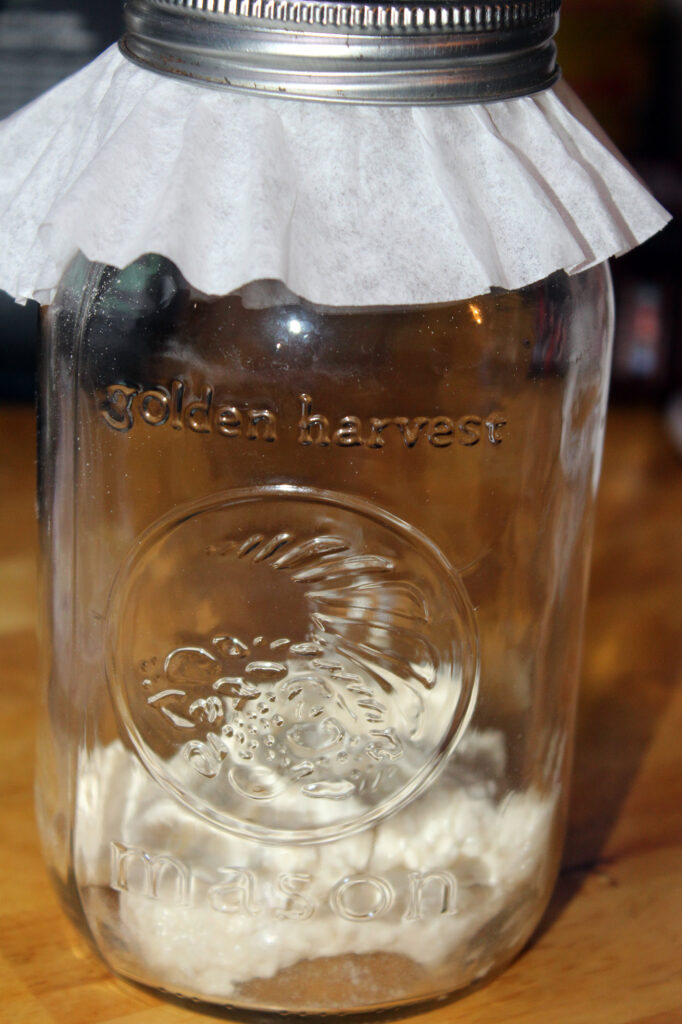
Day 1: I begin with 20 grams of dehydrated sourdough starter. Add 50 grams of warm unchlorinated water. Stir well and let it sit for a few minutes to soften and melt into the water. Next add 50 grams all purpose or unbleached flour, stirring well to mix everything. This will make a stiff dough, but that is okay. Place in glass jar covering jar with a coffee filter to allow air flow.

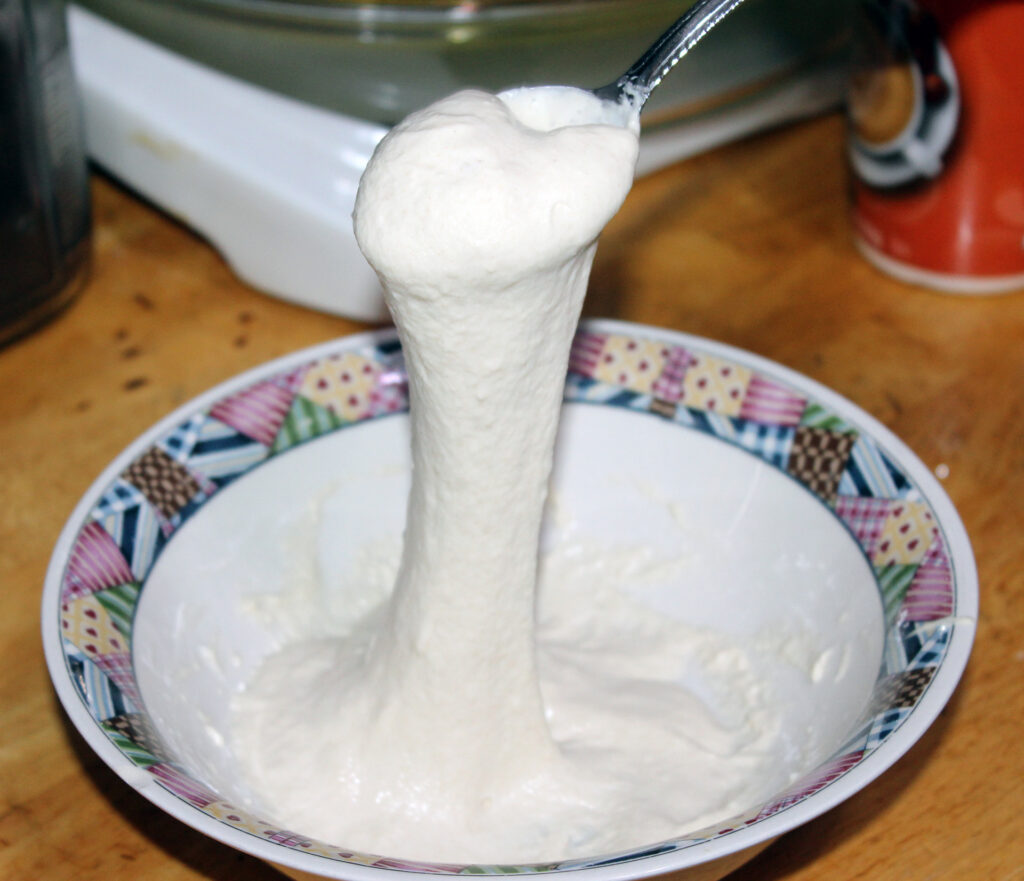
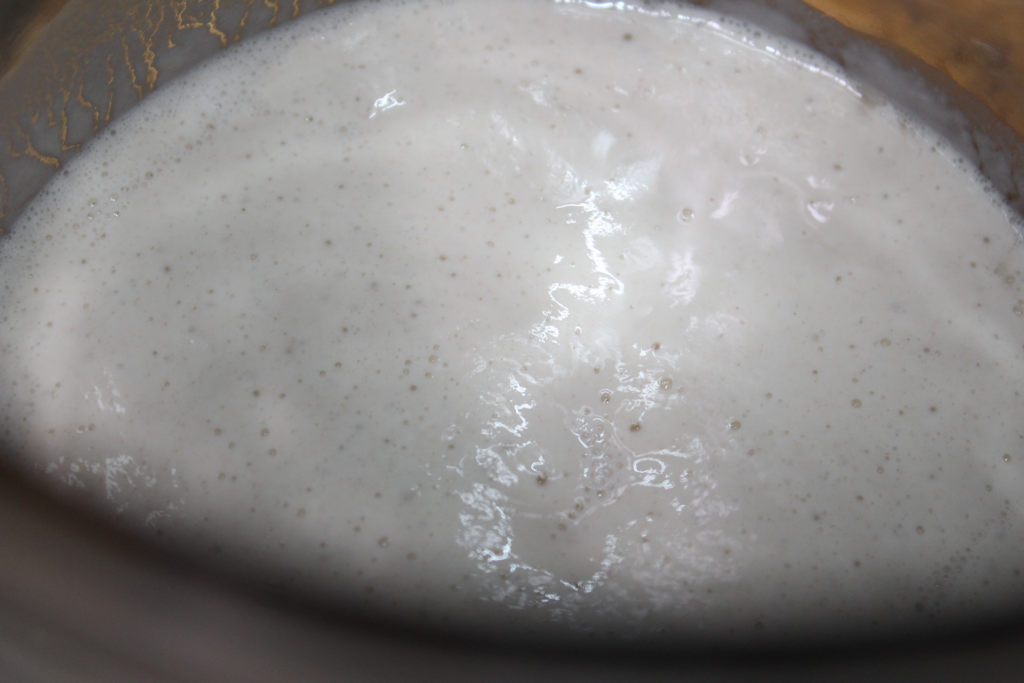
You will give you starter 2 feedings per day. Add 50 grams flour and 50 grams water mixing well.(always use all purpose or unbleached bread flour and unchlorinated water) The next photo is after I gave it the 2nd feeding on Day 1. You will notice that it is already becoming active. See the bubbles?

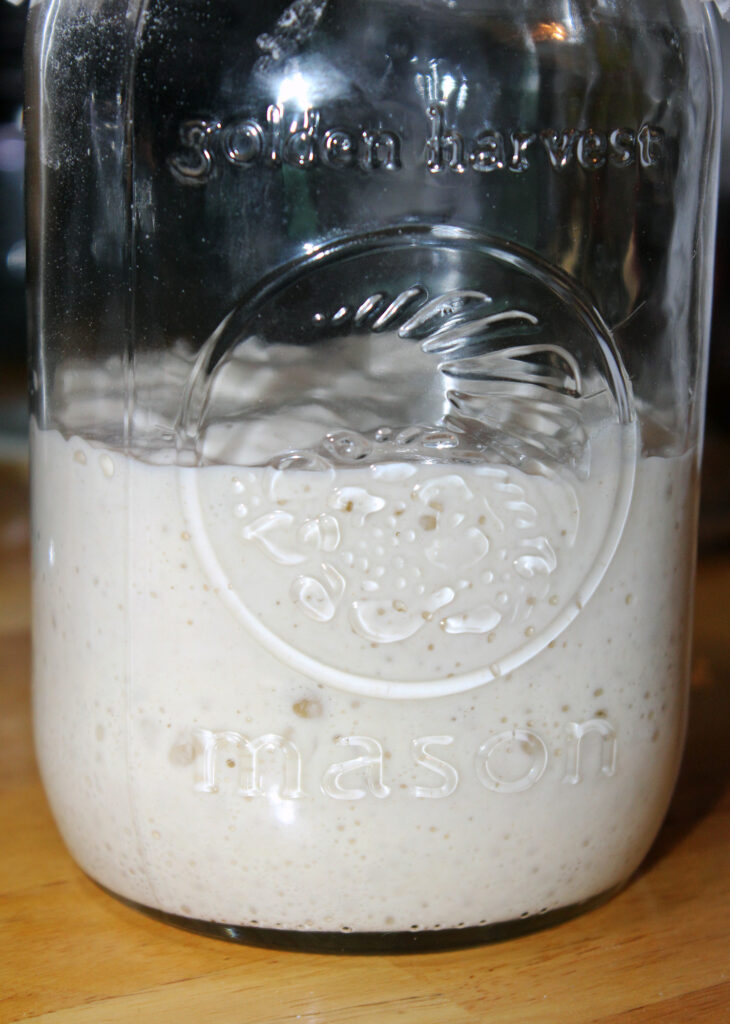
Still on Day 1 and look at all this activity!! Wow!!!

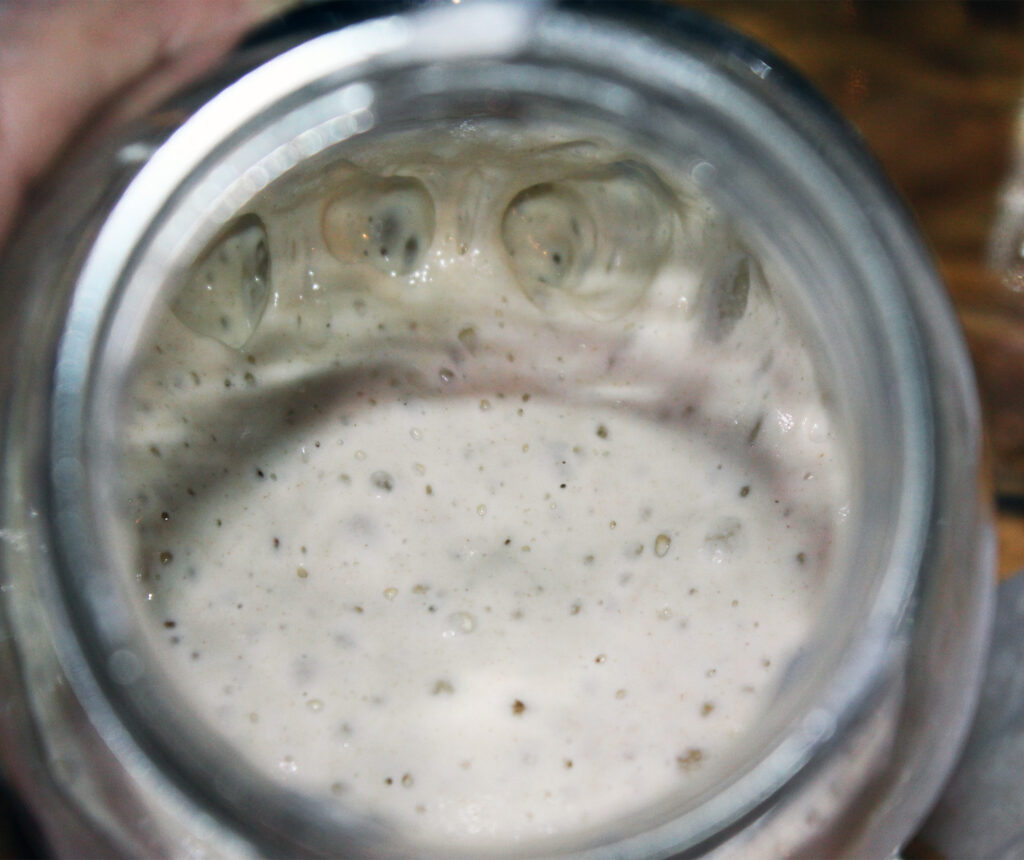
Day 2: take 50 grams of the starter and discard the rest. Add 50 grams of flour and 50 grams of water. Mix well. Place in jar and cover with coffee filter secured with jar ring or rubber band. Wait 12 hours and feed again in the same manner making sure to only use 50 grams of the starter and discard the rest. Now we wait on the beautiful bubbling activity!

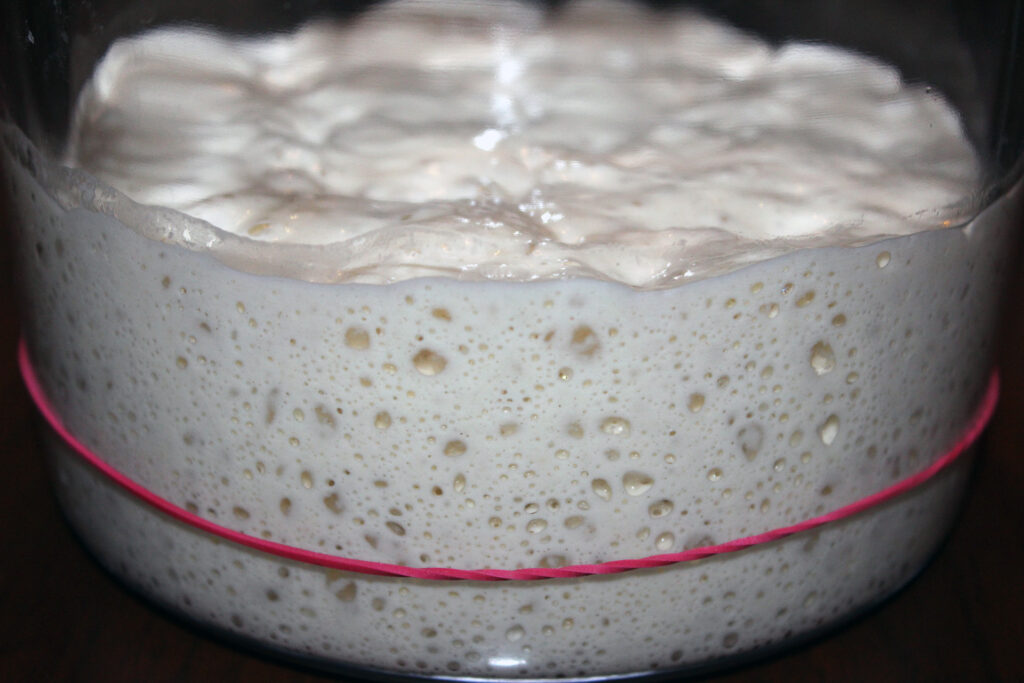
Looking inside the jar at the end of day 2.

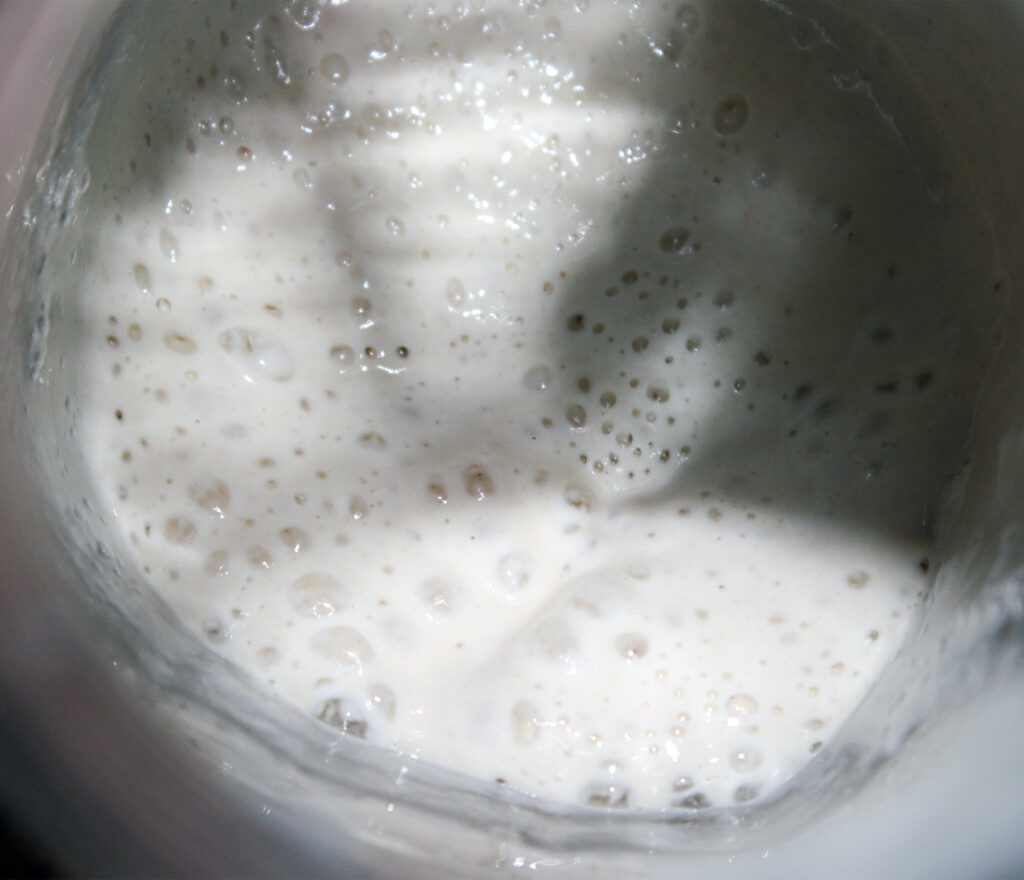
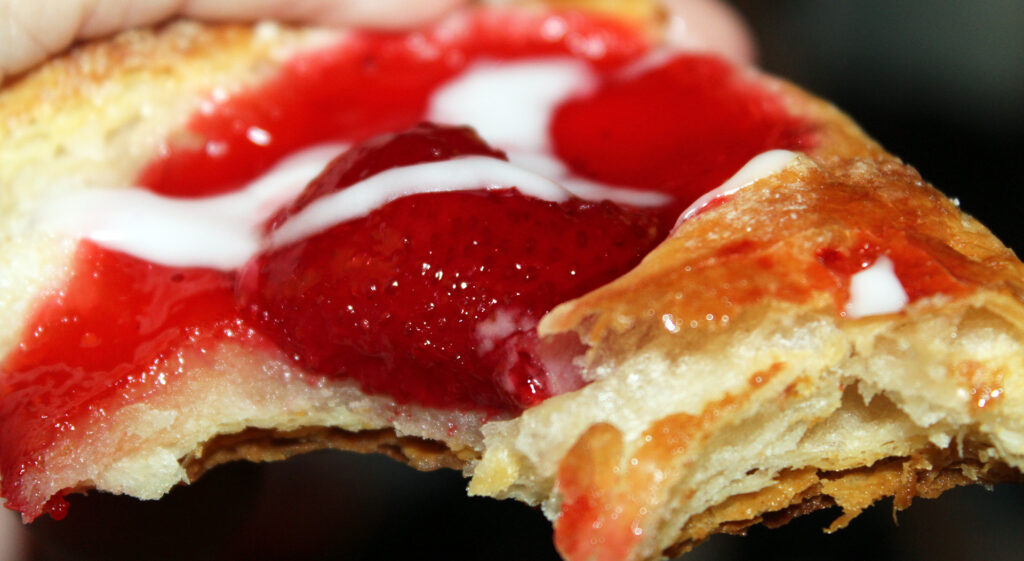
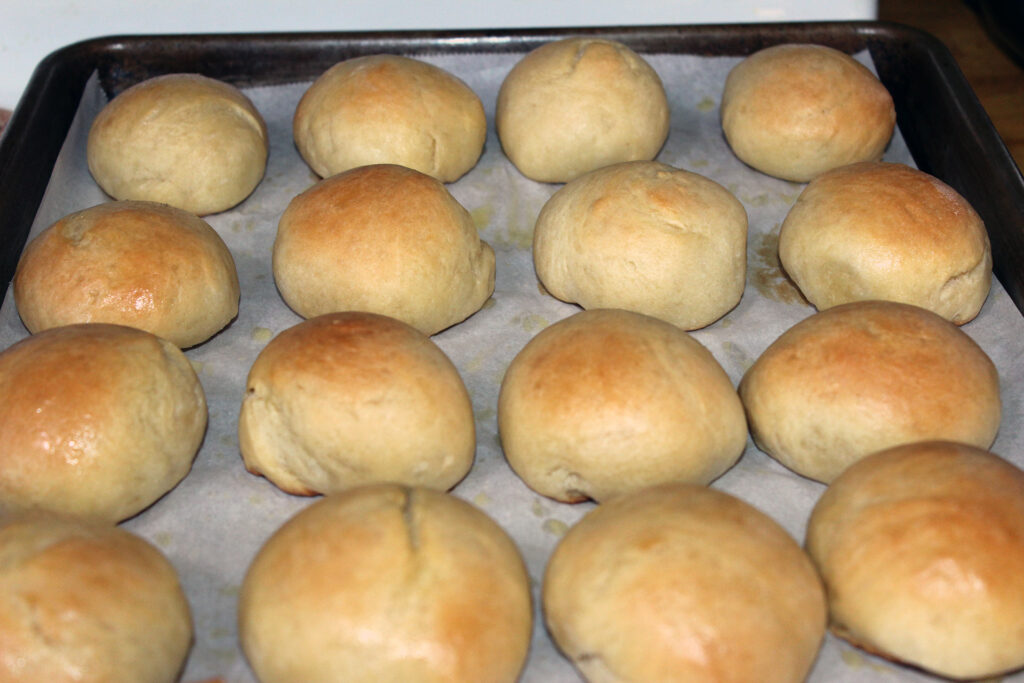
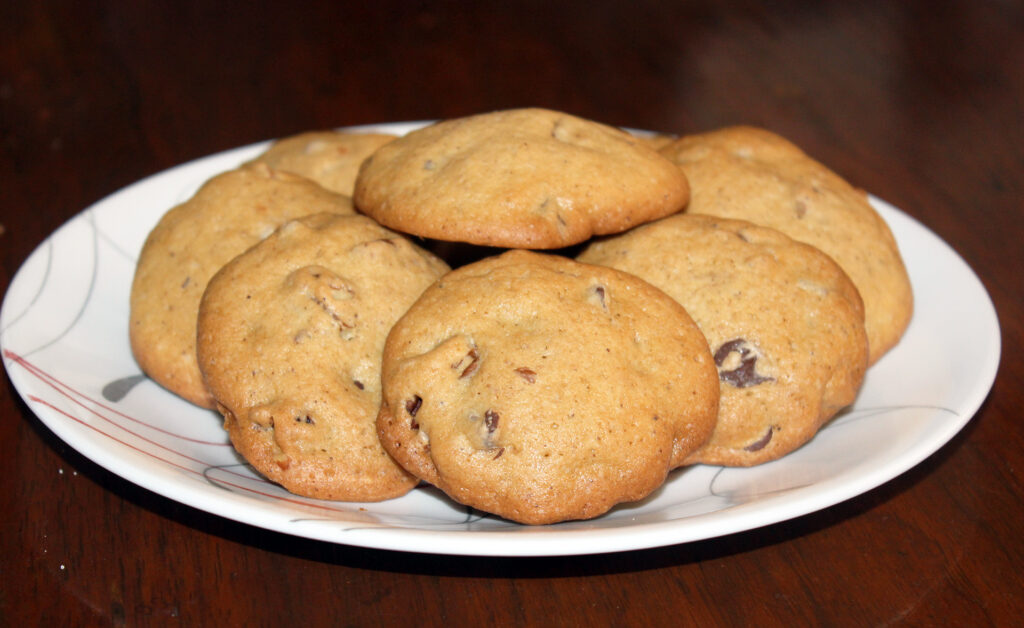
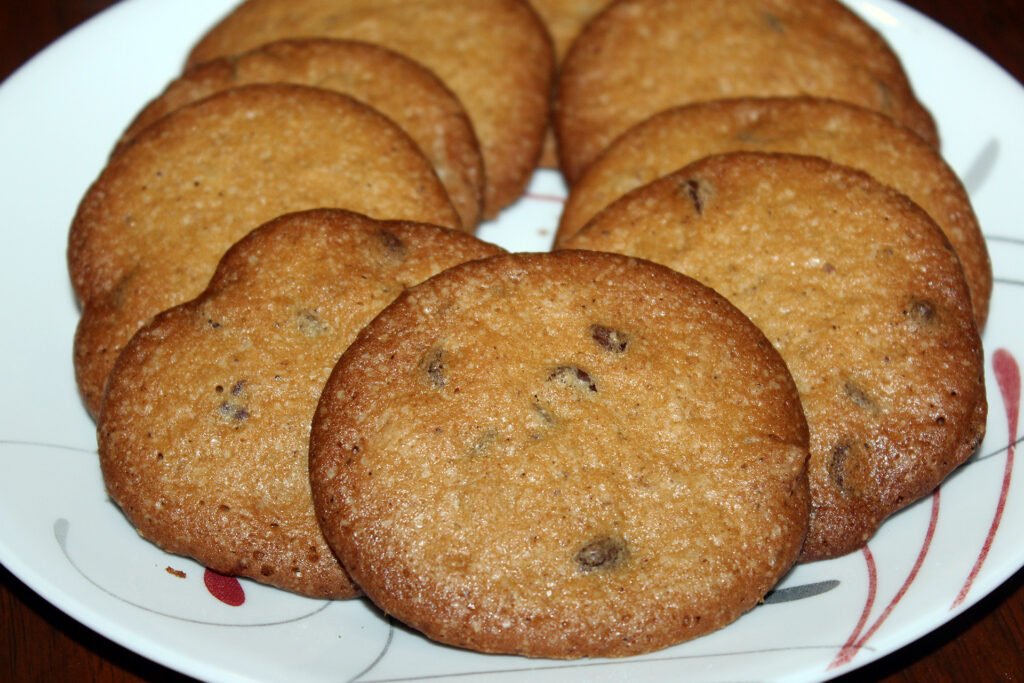
You will notice lots of activity! On the 3rd day, increase the flour and water to 100 grams of each to 50 grams of starter, repeat feeding and discarding every 12 hours. Your starter should be ready to bake with after feeding for 5-7 days as long as you see lots of activity and rise in your starter after it has been fed and several hours has passed. After feeding and discarding on day 5, I baked this with the sourdough discard!

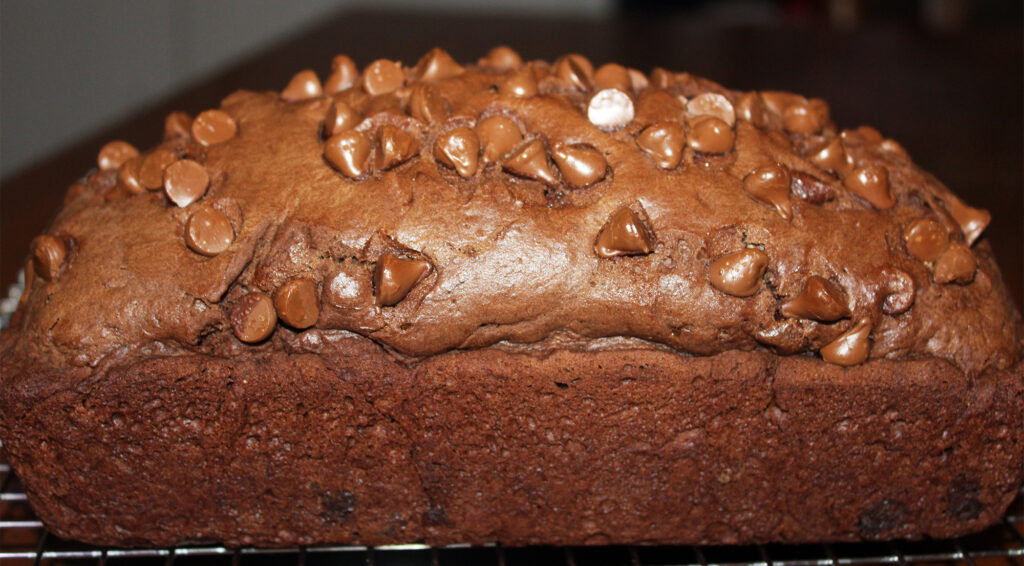
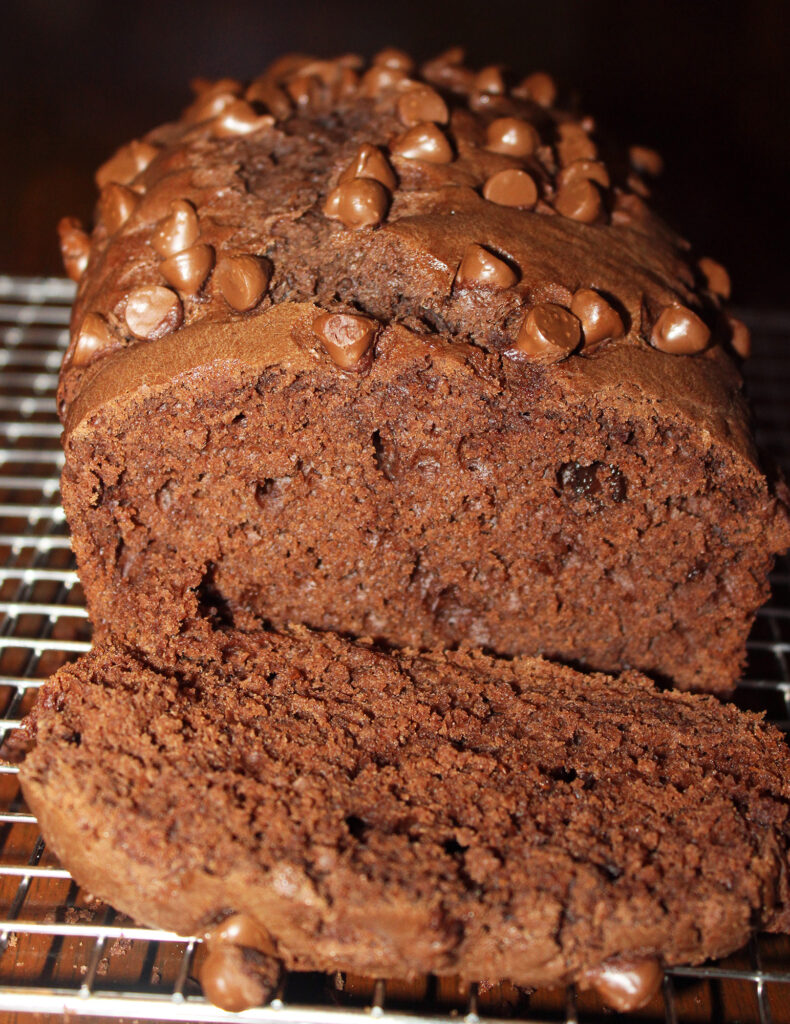
The darker spots in the bread are chocolate chips. I followed a recipe for this but I am going to create a new recipe of my own, so be watching for it! This bread is not quite sweet or moist enough for my taste. But it is delicious anyway, just needs some improvements.

Comments closed

Making Sourdough Breadcrumbs

If you have started sourdough baking and have baked bread or rolls, you may have found out that you had some leftover bread. With only 2 people in my house, that has been the case for me. But does anyone want to throw out the beautiful bread or rolls that were loving made for their family? No!! Too much time and effort, as well as expense, went into baking that bread! So what do you do with the excess? Of course we all have people we like to share with, but even at that there may still be excess bread.

Why not turn that excess bread into something useful? Why not make breadcrumbs? That is what I have decided to do with mine, and let me just tell you…they are some awesome breadcrumbs! I tasted mine and I must say….I love them! So any excess I have will be put to good use! Just crumble your bread and spread in a baking pan, place in a preheated 300 degree oven for 10 minutes, give them a good stir, bake 5 to 10 more minutes or until the bread browns and dries out. Delicious, healthy and quick!

While I didn’t add any seasoning to mine, I am sure you could add in your choice of herbs and spices. Enjoy!

Comments closed

Sourdough Starter…a few weeks later!

I have seen many different methods of starting and maintaining a sourdough starter. No wonder it is so confusing for new people, trying to get started! Like I have told y’all before…I am 69 years old and I guess in all those years I have learned to be persistent (my husband would call it hard-headed!). I believe that if anyone else can do it…so can I, and I won’t give up trying!

In the title, I said a few weeks later. I know many people count the days, weeks and even hours since they first mixed up their original starter, but I have been too busy trying recipes (some good, some awful!), and I honestly have more to do with my time than count down the days, weeks and hours! I do, however, remember mixing up my original starter. I mixed 1/2 cup all purpose flour with 1/2 cup tap water that had been drawn up to let the chlorine evaporate. I remembered seeing that chlorine and other chemicals in water can kill the natural bacteria that needs to form in the starter. I didn’t see the part that recommended using bread flour instead of all purpose, however my started did fine with all purpose. (I now use bread flour to feed my starter and did after I found out that is what gives better results.) But trust me when I tell you…you can develop a successful starter with all purpose flour. I did!

When you use the 1:1:1 ratio, as you should do in the first week, the starter will be thin. After a week of feeding 1/2 cup flour and 1/2 cup water to 1/2 cup reserved starter, I began to notice bubbles, but not as much as I would have liked to see. Reminding myself that patience is a virtue and Rome wasn’t built in a day, I pressed on! I decided to increase the amount of flour and water when I fed my starter. It created a thicker starter and I began to see more activity in my starter. I followed the recommended ratio of 1 part starter to 2 parts flour and water…1:2:2 ratio. While the activity did increase, and I was steady baking with the discard, it still didn’t show as much activity as I would have liked. So after another week or maybe two, without seeing much change at all, I began to experiment! ( I told you I am persistent!) I decided to increase the amount of flour to make a thicker starter. That is where I am today! I now have a food scale ( which I highly recommend) and I weigh all my ingredients when I mix my starter. My mix this evening was 50 grams of starter, 100 grams of unbleached bread flour and about 75-80 grams of water. A weird mix, I know, but it produced a nice thick starter which seems to work better for me. So let me encourage you to experiment to find that “happy mixture” that will produce the end results you are looking for. Just don’t get discouraged, and don’t quit without giving it your best effort. After all, you and your loved ones deserve the best, and you can do it!!! I believe in you!!!

Comments closed

Sourdough Puff Pastry

Have you tried to make sourdough puff pastry yet? Yes, it requires a lot of work, but it is so worth the effort you put into making it! I was absolutely astonished how light and flaky it turned out. And you can add many different toppings, or create many different desserts with it. Here is a quick photo of the dessert I made with my puff pastry.

You see all those layers? Trust me when I tell you, the only problem I had with mine was making myself stop eating them and the fact that they ran out long before I wanted them too! LOL

I used a strawberry topping on mine, but you are limited by your own taste and imagination! Just imagine serving these to family or friends and seeing the look of surprise on their face when you tell them you made it! They turn out that beautiful!! Honestly… I kept looking at mine and thinking, “wow, I can’t believe I made these!”. Were they worth the effort I put in to make them? You better believe it!! In fact, I love them so much I currently have a puff pastry in the refrigerator to make some today. So find you a good sourdough puff pastry recipe and start baking a beautiful dessert. You will be so glad you did!!

Comments closed

Sourdough baking is the best!

Each day I think of what I would like to make for the next day! Do you do that too? I am thankful that I decided to start my sourdough adventure, and I must say…it is quite satisfying!! I love creating delicious things for the people in my life, and knowing that sourdough has so many health benefits makes it even better.

I have read that sourdough provides nutrients, including healthy carbs, protein, fiber, iron and vitamins like folic acid. It may help improve digestion, lowers chronic disease risk such as rheumatoid arthritis, lowers the risks for certain types of cancer and even promotes healthy aging. While sourdough has been around for thousands of years and is the oldest type of leavened bread on record, it is still being enjoyed in many cultures today. The leaven (what makes the dough rise) is a natural formed yeast in the sourdough starter which is made from a mixture of unbleached flour and water. It is a wild yeast that produces lactic acid which is what gives sourdough its distinct tangy flavor, but the lactic acid also serves another purpose. It kills unwanted bacteria, keeping sourdough starter safer from going bad. It makes me feel good knowing that I can bake things that are healthier for my family.

And the smell of fresh baked sourdough is so wonderful. Even the dough itself smells fresh and good to me! I find working with sourdough to be a very therapeutic thing for me. I love the whole process, from feeding my starter to baking delicious things and filling my house with an aroma you can’t buy in a bottle…I just enjoy it all. And the reward of baking a recipe and being overwhelmed with the taste and appearance is priceless! I am sharing with you a picture of a recipe I baked a couple of days ago. I did not follow the recipe completely, but the results was awesome. Don’t be afraid to tweak a recipe to your liking. While I do create many of my own recipes and have shared some on this blog on the recipe page, I still use other recipes I find online and most of the time I tweak them to my own liking. Just enjoy your baking and don’t be scared to alter things a bit. You may be pleasantly surprised! Happy baking!!

Comments closed

Sourdough baking…it all begins with starter

Starter

With just a tiny bit of your time and very few supplies you can create a sourdough starter that can be passed down for generations! How cool is that?

Sourdough cultures contain communities of living organisms, with a history unique to each individual starter, and bakers can feel an obligation to maintain them. The different yeasts present in the air in any region also enter sourdough, causing starters to change depending on location. So your sourdough is uniquely yours!

All it takes is unbleached or all purpose flour and filtered water to create your starter. If you don’t have a filtering system for your water, just boil the water for 15 minutes on a slow boil to remove the chlorine, allowing the water to completely cool before using, alternately you can draw up a container of tap water and let it sit out for 24 hours so the chlorine will evaporate. You may also use whole wheat or rye flour. Make sure to feed at the same time each day. I recommend using a digital food scale to weigh your ingredients in grams instead of ounces because it is more accurate to me.

Day 1: Start out with 50 grams of water and 50 grams of flour. Mix well. Place in a jar with lid and allow to sit in a warm place for 24 hours. You will notice at this point that your starter consists of 1/2 water and 1/2 flour.

Day 2: 24 hours later, remove1/2 or 50 grams of your starter. This is your sourdough discard.

You should store the discard you keep in the refrigerator if you are not going to make something with it. Many people say to throw out the discard for the first 7-14 days, but I began to bake with mine and soon as I started seeing a lot of bubbles forming in it, which was around day 7 I think. Take the remaining 50 grams of starter, add 50 grams of flour and 50 grams of water. Mix well and put in jar with lid and sit on counter in a warm place for 24 hours. You have now fed your starter. As far as warm places go, I have placed my jar of starter in the oven with the oven light on for warmth. Make sure no one turns on your oven if you do this because some people have had quite a disaster when that happens!

Day 3: Stir starter and take out 50 grams to feed, the remainder will be added to your discard jar and you may use to bake or place in the refrigerator. To the 50 grams of starter you removed add 50 grams flour and 50 grams water. Mix well, place in jar with lid and sit in a warm place for 24 hours. You may begin to see some bubbles forming(a few) in the starter, and that is great! It means your starter is growing and beginning to come alive!

Day 4-7 you will continue to take out 50 grams of starter to feed, return remainder to discard jar to refrigerate or begin to bake discard recipes. Feed the 50 grams of starter as you did on day 3, place in jar with lid in a warm place. By day 7, you should surely be seeing some bubbles and activity in your starter. You will notice bubbles forming on the top and sides.

How exciting!! It’s alive!!! You have every right to be smiling at this point. You have persevered instead of giving up, like some people, and throwing it out. Soon you will have that active starter you want!

Beginning on Day 8-14: Take 50 grams of starter from your jar. Today you will increase your feeding a bit. You will add to your 50 grams starter, 75 grams water, 100 grams flour. Mix well and sit in warm place to grow. Continue to feed in this manner every 24 hours until you have a starter that is covered with bubbles on the sides and top. By the 14th day your starter should be bubbly and ready to produce delicious baked products. Enjoy!

Comments closed

Sourdough Chocolate Chip Pecan Cookies!

Crunchy and delicious…

Who doesn’t love chocolate chip cookies? Add pecans to the mix and I am in heaven! In all my years of baking, I have found my cookies were never exactly how I wanted my cookies to be. They were either too thick and cake-like or they were too chewy and doughy.

Less than perfect…not what I was trying to accomplish!

My search for the perfect chocolate chip cookie led me to create my own recipe! I spent yesterday creating the recipe and last night was spent baking , testing and perfecting my recipe. The first batch was less than perfect…not quite sweet enough and too cake-like!

Adjustments were made and the results was amazing!

So I adjusted my recipe and baked again! The second batch was exactly what I have been searching for!! So crunchy…so thin and delicious!!

End results… a perfect, thin and crunchy sourdough cookie!!

I have posted my recipe on the recipe page..

For all of you that love thin, crunchy cookies, I have shared my recipe on the recipe page. While I don’t prefer a huge amount of chocolate chips in my cookies, you may and in that case I think you would be safe to add up to a cup more. I also added chopped pecans to mine, but this could be substituted for toffee brittle or another type of nuts. They also freeze after baking, really well. I froze some and got them out this morning to test them. I packaged mine 3 to a bag in sandwich bags, got all the air out and zipped them shut. Then I placed all the sandwich bags in a Ziplock gallon freezer bag and zipped it shut. Now when we want a cookie we can just take out a sandwich bag and zip the rest back up in the freezer! With the cost of groceries I am all about no waste!! I hope you will enjoy my recipe! Happy sourdough baking!!

Comments closed

Sourdough baking…loving it!

I don’t know how I survived all those years without it in my life!

I have been busy today baking kolaches and working on new recipes to try. If you love sourdough as much as I do.. then I am sure you have been busy, and you understand! And of course I have to feed my starter.

I have found out through trial and error that not all recipes turn out right. Therefore, if it is something that I love…like biscotti…I am determined to create a recipe that works for me. I have accomplished my mission for today! Not only did I create the recipe, I baked and tested the recipe(yummy!). And the great news is that you can actually bite it without breaking a tooth from it being rock hard! If you read my earlier blog post about biscotti then you know what I mean!! They are crunchy but biteable! The real icing on the cake, so to speak, is that they are absolutely delicious!

I have posted my recipe on the recipe page. They freeze well too. I usually package mine individually in sandwich bags, squeezing all the air out before sealing, then I place all the sandwich bags in a gallon freezer bag and zip them up. When I want one I just remove a bag with one and zip up the rest. Thaw and enjoy! I don’t recommend heating in the microwave!!

Comments closed

Another Sourdough Baking Success!

Sourdough Sausage Kolache

These just came out of my oven and I have got to say they are absolutely delicious! I have had sausage kolaches from bakeries that were no match to these!

I love link sausage anyway and coming from Alabama, we have the best sausage ever made, and they are made in Conecuh county , Al., called Conecuh Sausage. This sausage comes in numerous flavors having six different varieties and one specialty variety that comes out around Thanksgiving. I am sure any of them would be off the chart delicious in this recipe. The variety I had on hand was the Hickory Smoked Conecuh Sausage and I can tell you right now they are awesome!! If Conecuh sausage is not available in your neck of the woods, they do ship!

The sourdough with the Conecuh sausage is a match made in heaven! They are seriously that good, y’all!!

So find you a good recipe for Sourdough Kolaches (I found my recipe online) and make you some! You won’t be sorry…unless you eat so many that you have to buy new pants, but that is a story for another day!! LOL

Comments closed

Sourdough Biscotti

Who doesn’t love biscotti? I was very happy to find a recipe for sourdough biscotti. Let me tell you, this is absolutely delicious….if you can manage to chisel off a bite! I have never in all my years tried to eat anything this hard… hard candy excluded of course!! I’m talking “Ellie Mae biscuit” hard, from the tv sitcom The Beverly Hillbillies. Remember her biscuits could knock down a door! I’m talking break your tooth right out of your mouth, hard!! What good is all that deliciousness if you cannot bite it? I realize biscotti is to be dipped in coffee or tea but even at that it is undeniably hard. The good news is that if you have an infant that is trying to cut a tooth…here is your teething biscuit!! Just take some with you in your car and if someone tries to grab you just poke them in the eye with a biscotti and change their point of view!!!

Laying all jokes aside, this biscotti has a wonderful flavor and I intend to find a way to create a recipe that will not require a hammer a chisel to eat it. Bottom line is, that there are many recipes floating around on the internet. Some good…but some that need improvement! If you come across one that doesn’t suit your taste, don’t stop trying! Look for ways to tweak the recipe and make it into one that you and your family will love.

Comments closed